This guide explains 2 ways to Install Citrix Receiver and Connect to Desktops from Ubuntu and Other Linux.
Many organizations use commercial Citrix technology to provide their employees with remote connections via virtual machines. Citrix uses its proprietary tech to provide connection services.
To connect to a Citrix Virtual machine, you need to install Citrix client software. Citrix provides the client installer for Windows systems which you can just install, and it will work.
However, for Linux, the story is different. Because of various package dependencies and compatibility of the upstream Kernel version – it is sometimes difficult to install Citrix Workspace App (formerly Citrix XenApp plugin).
Here are two ways that you can install and connect to Citrix desktops. The first method requires the installation of packages and requires admin privileges. The second method is browser-based, which requires a Google Chrome browser only (no admin privilege requires).
Table of Contents
Method 1: Install Citrix Receiver in Linux and Connect to Desktops
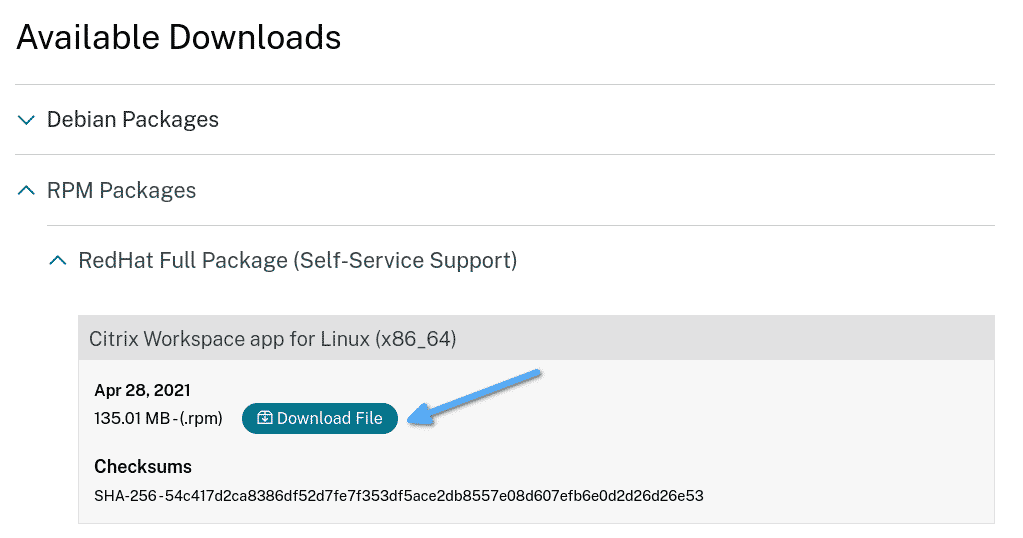
Install Citrix Workspace App for Fedora, Red Hat, and Other .rpm-based distributions
Download the below .rpm package for 64-bit systems. Go to the below link. Click on RPM Packages, then Red Hat Full Package (self-service support). Then click on Download file under “Citrix Workspace app for Linux (x86_64).”
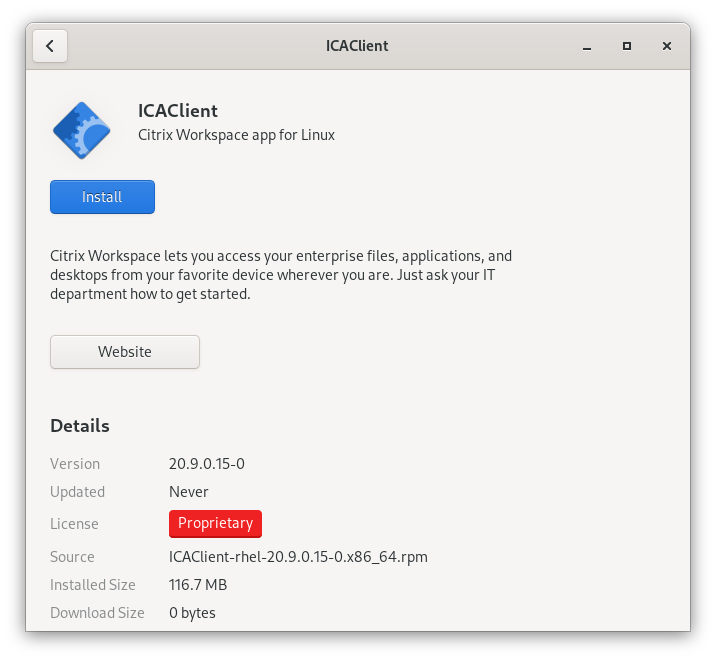
Open the .rpm package via Software or any package manager for installation. All the dependencies should already be present in your current system.
Now, go to the Uses section below on how to use it.
Install Citrix Workspace App for Ubuntu, Linux Mint, and Other Debian-based distributions
Download the below .deb package for 64-bit systems. Go to the below link. Click on Debian Packages, then Full Package (self-service support). Then click on Download file under “Citrix Workspace app for Linux (x86_64).”
Open the .deb package via Software or any package manager for installation. All the dependencies should already be present in your current system.
After the installation, the program will install a Systemd service (/lib/systemd/system/ctxlogd.service), as mentioned below (example). For any troubleshooting, you can check this service.
Synchronizing state of ctxlogd.service with SysV service script with /lib/systemd/systemd-sysv-install.
Executing: /lib/systemd/systemd-sysv-install enable ctxlogd
Created symlink /etc/systemd/system/multi-user.target.wants/ctxlogd.service → /lib/systemd/system/ctxlogd.service.
Now, go to the Uses section below on how to use it.
How to Use Citrix Workspace App
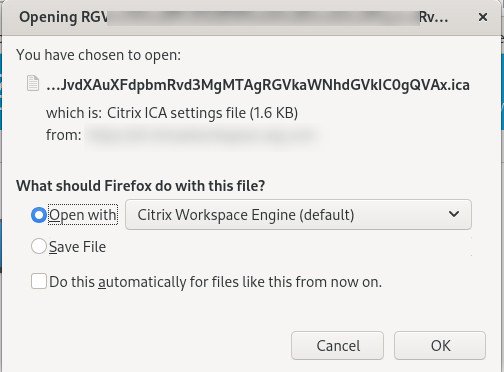
After the successful installation, open any browser and visit your organization’s login page. And try to open the virtual machines.
The virtual machine .ica files should be downloaded. You can click to open it. It will open via Citrix Workspace App by default file associations.
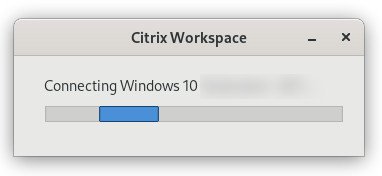
Now, your target desktop should be opening with the native Citrix plugin.
Method 2: Install and Connect to Citrix Desktop via Google Chrome Extension
Note: As of 2023, the following extension will only work on ChromeOS, Chromebooks.
Go to the below page and click on the “Add to Chrome” for the Citrix Workspace App Chrome Extension.
Remember, this extension is the official Citrix-provided extension. But it will not work in any other Chromium-based browser, e.g. Microsoft Edge, Chromium, Vivaldi, etc.
So, you have to use Google Chrome only to make it work.
How to use Citrix Workspace Chrome Extension
After installation, click on Launch or visit chrome://apps from Google Chrome Browser.
Click on the Citrix Workspace App.
Now, type the URL of your Organization’s Citrix login. And you should be all set.
Troubleshooting and FAQ for Citrix Receiver in Linux
1. ALT+TAB via keyboard doesn’t detect the windows inside Citrix
The keyboard binding should work when you log in to the virtual machine. Sometimes, the ALT+TAB doesn’t work while you are inside the Citrix virtual machines with native windows. Instead, it switches the applications on the host systems.
If this happens, temporarily change the ALT+TAB keyboard binding to something else, e.e. ALT+~ in your host system.
2. Trusted certificate error
If you receive the error “you have not chosen to trust the issuer of the server’s security certificate“, follow the below instructions to fix it.

This is caused by the incorrect setup of your Citrix server’s certificates in your client system. It requires manual re-installing of the certificate pem file.
- Firstly, download the pem file from the web browser. If you are using Firefox/or any browser, click on the small “lock” icon at the address bar, then click on More Information.

- Secondly, click on View certificate in the certificate window (this page might look different in Chrome).

- Then select the proper certificate tab (this should match the error you received) and click on Download PEM(cert) under Miscellaneous.

- Open a terminal prompt. And copy the downloaded pem file to
/opt/Citrix/ICAClient/keystore/cacerts/. Make sure you verify the ICAClient installation directory and file name. In addition, this needs to be done by the root user.
Sample command
sudo cp sample_file.pem /opt/Citrix/ICAClient/keystore/cacerts/
Finally, re-hash the certificate for final processing using the below command.
/opt/Citrix/ICAClient/util/ctx_rehash

Now, refresh the Citrix URL page in your web browser, and you should be able to connect.
For more details about this troubleshooting, visit this page.
Wrapping Up
Finally, I would recommend using the Add-on option if all the options fail for you. I hope this guide to installing the Citrix receiver for Linux helps you to connect to your virtual machine.
Do let me know in the comment box below if this article helps you.


