A simple tutorial on how to increase virtual machine size in VirtualBox.
VirtualBox is one of the popular virtualization software that allows you to create and manage virtual machines (VMs).
One of the common issues that you may face is the running out of disk space on VMs which you created in VirtualBox. You may have specified a size while creating the VM, but as time goes on, you end up with low disk space issue.
In this article, I will talk about how to increase the size of your VirtualBox virtual machines.
Increase Virtual Machine size in VirtualBox
The below instructions are for VirtualBox 7.0 and above.
- Open VirtualBox and ensure all your VMs are shutdown.
- From the menu, select File > Tools > Virtual Media Manager.
- On the hard disk tab, select the name of your virtual machine whose size you want to increase.
- Click on properties from the toolbar (or right click > properties).
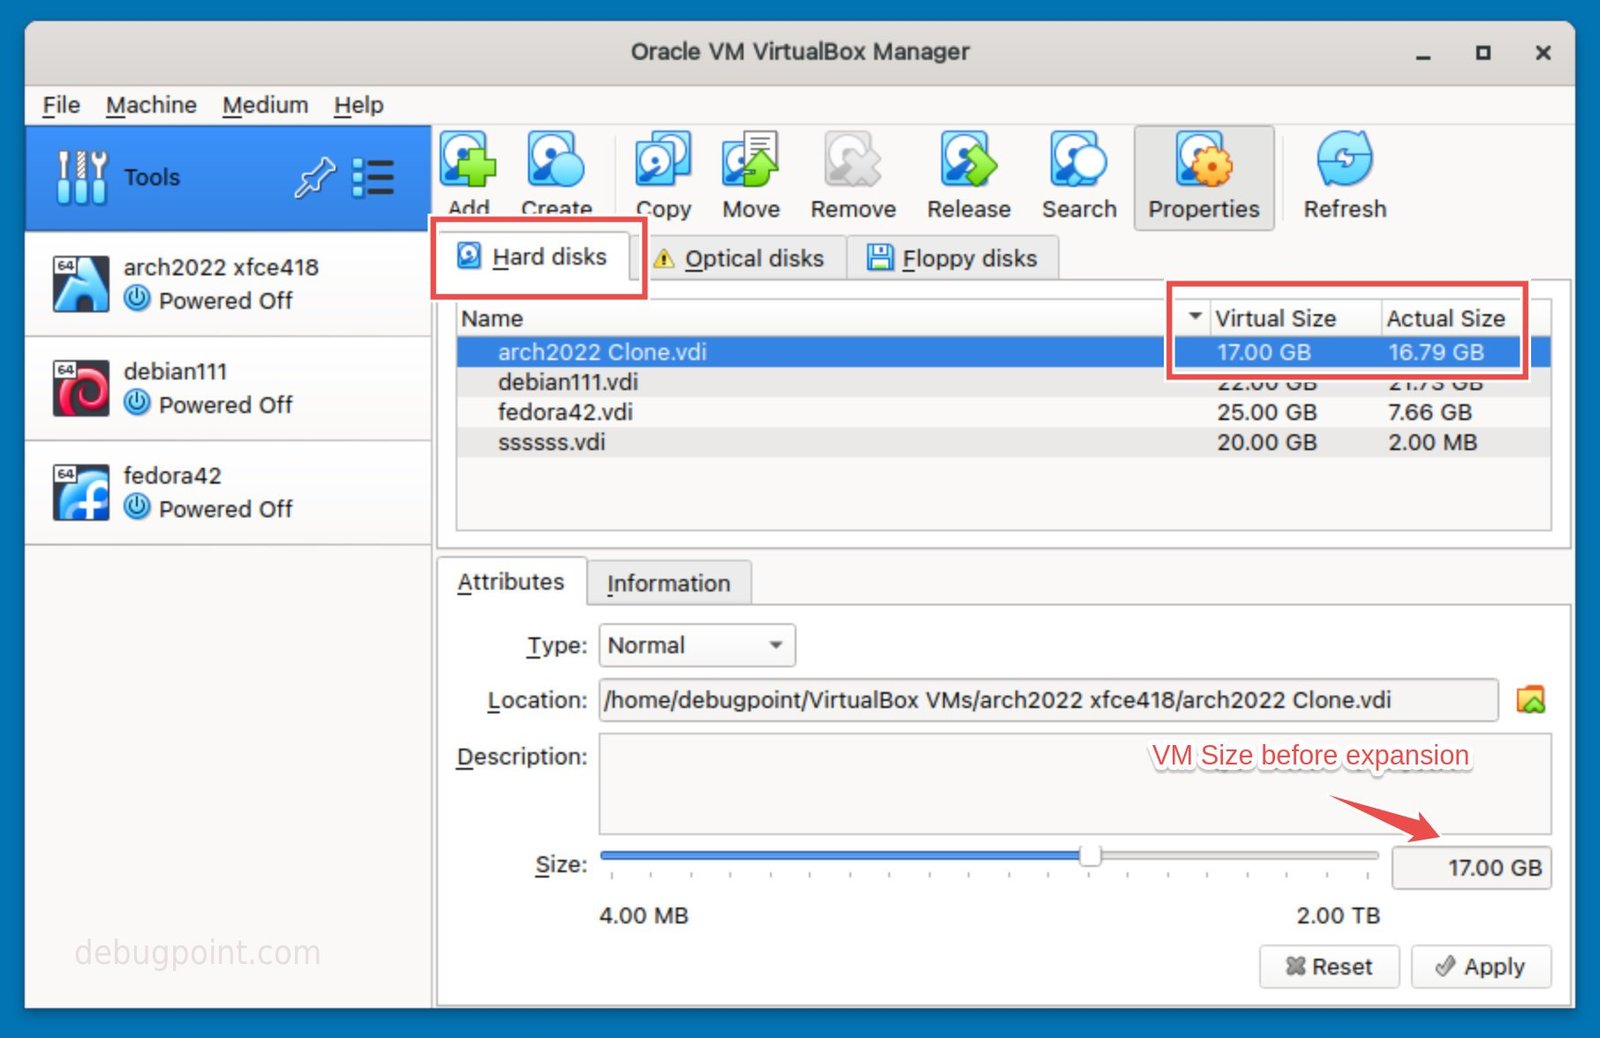
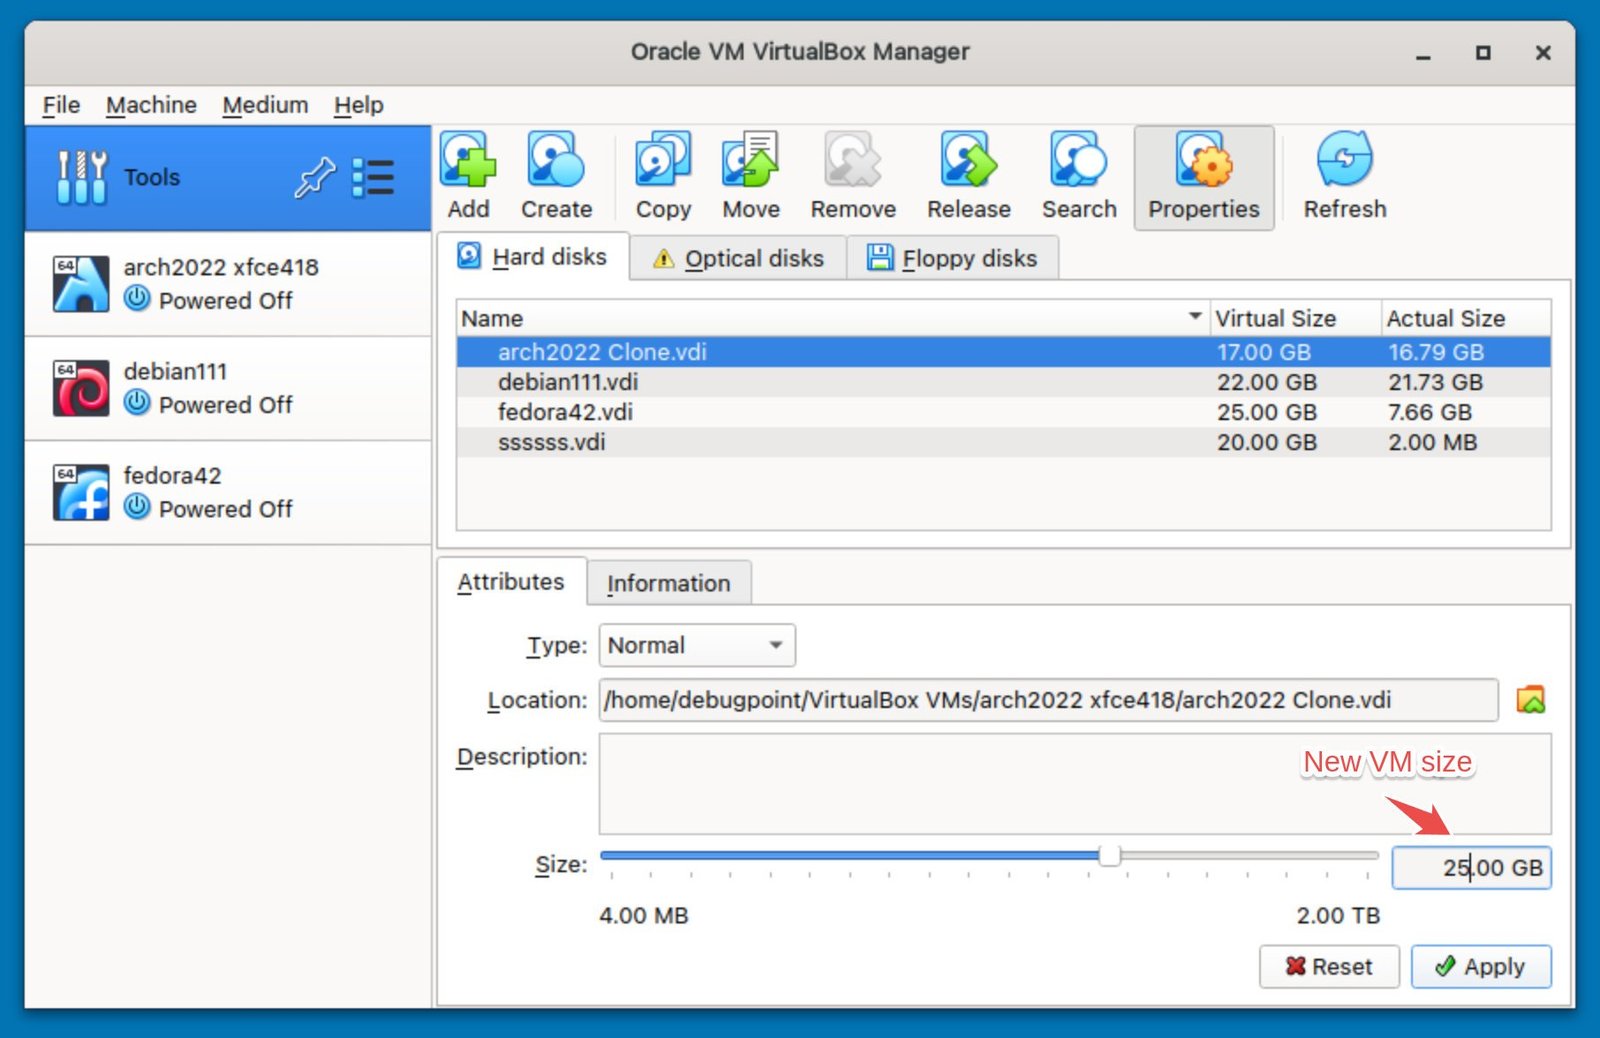
- At the bottom, under the Attributes tab, you should see a size bar. Increase it to your desired size for your VM.
- Click on apply. You should see the new size in the main page of the VirtualBox when you select your VM.

- But the steps are not complete yet.
- Boot into your guest virtual machine.
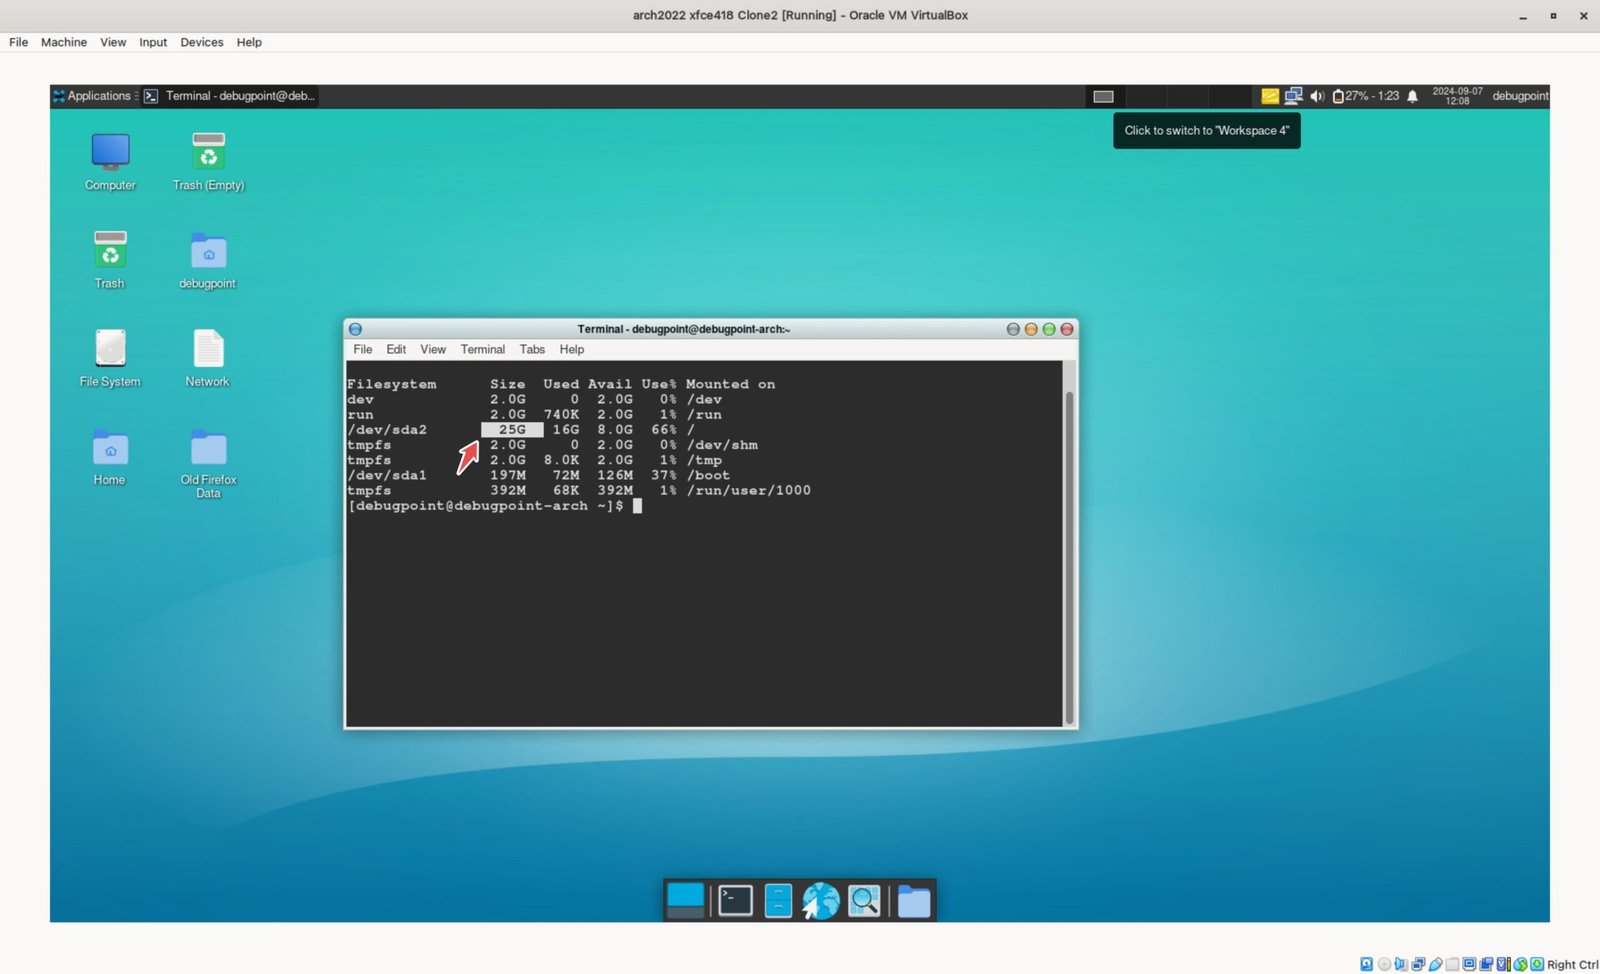
- If it’s a Linux VM, open a terminal and run
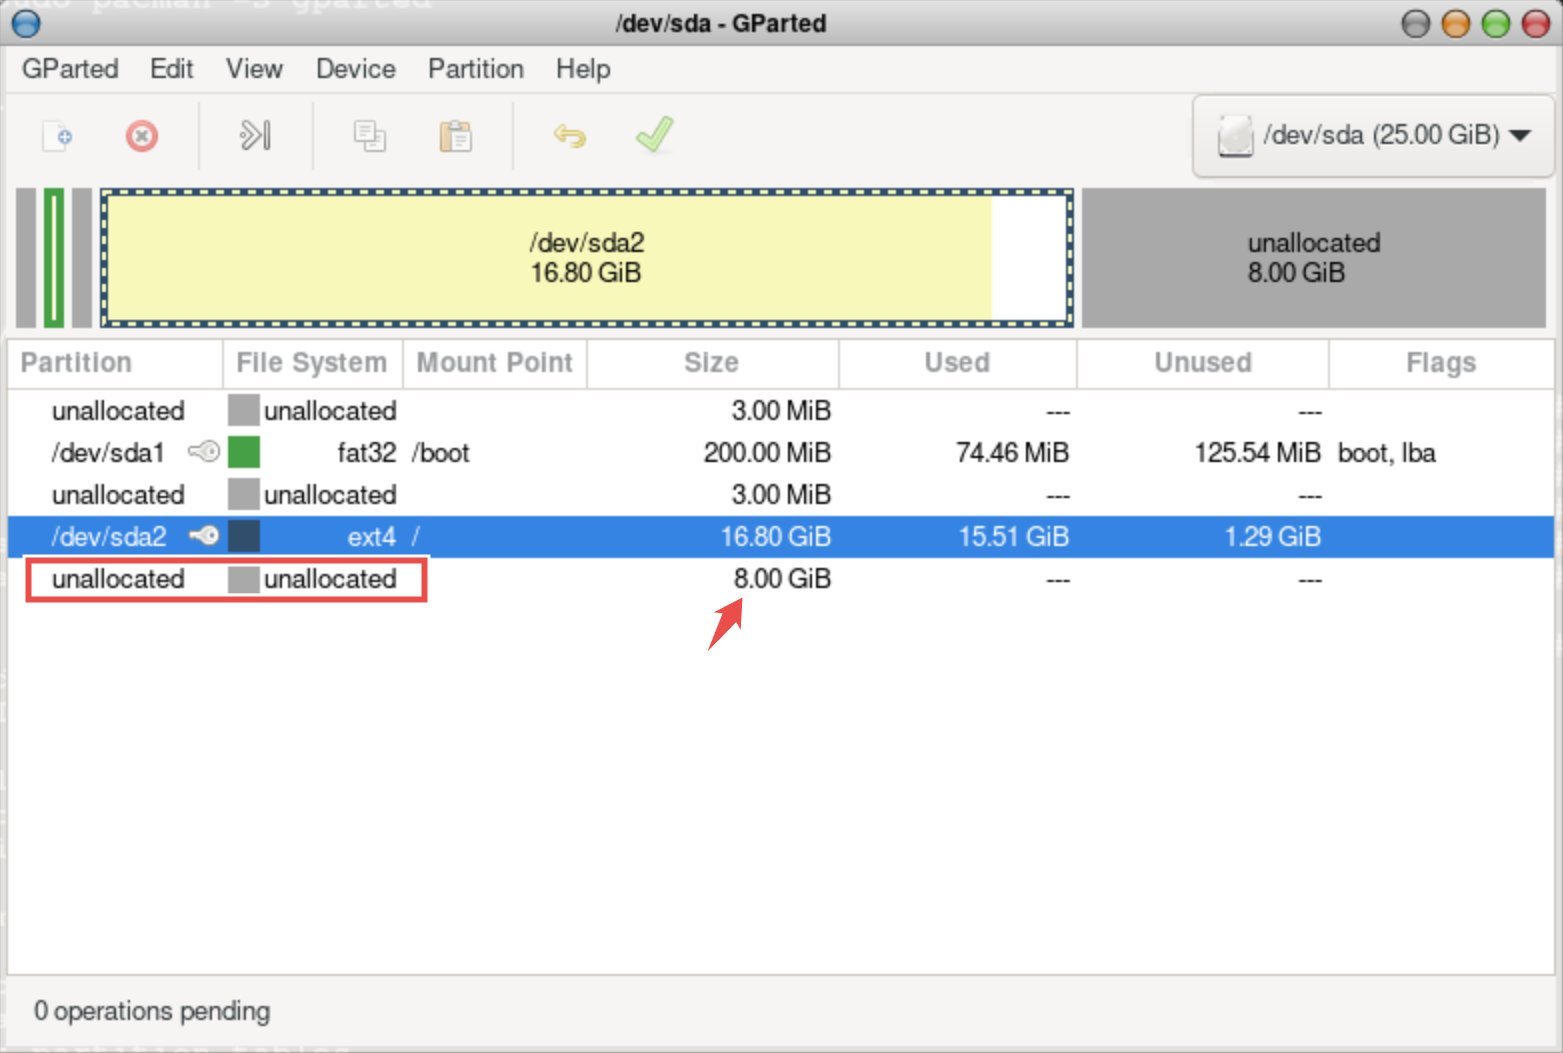
df -hto see whether the new size is showing. In most of the cases, it should not. Because, when you increase your VirtualBox size for the VM, the guest VM OS doesn’t know about the extra size. Because it was NOT part of the guest VM’s partition table when you last booted into it. - As, you can see in the below example, the size is still showing as the old size.

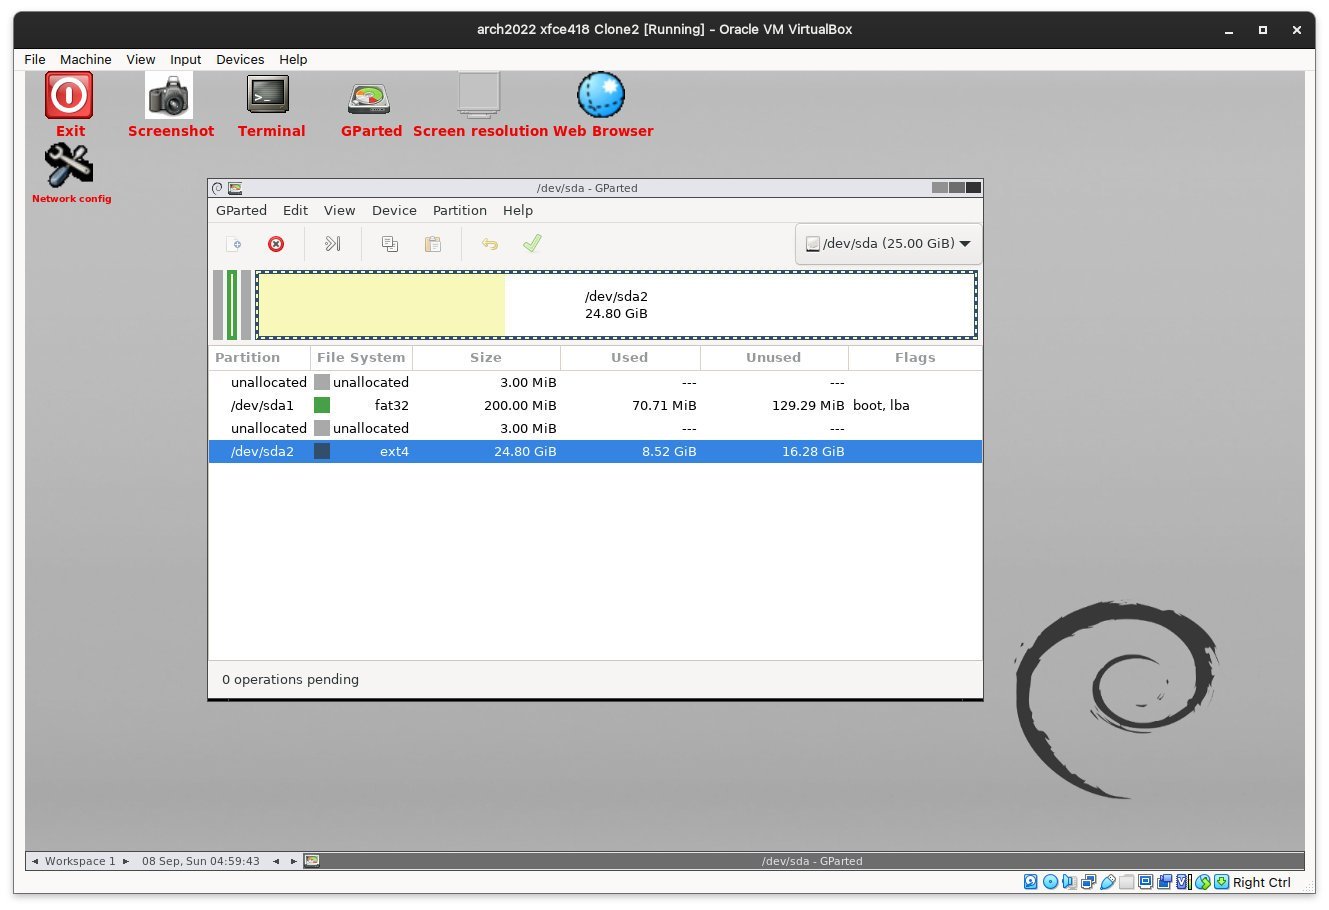
- To continue, open Gparted or any other partition editor from your guest VM.
- Analyse your guest VM partition table. You should see the additional size is shown as “unallocated space”. You need to resize your root partition to use this newly allocated space.
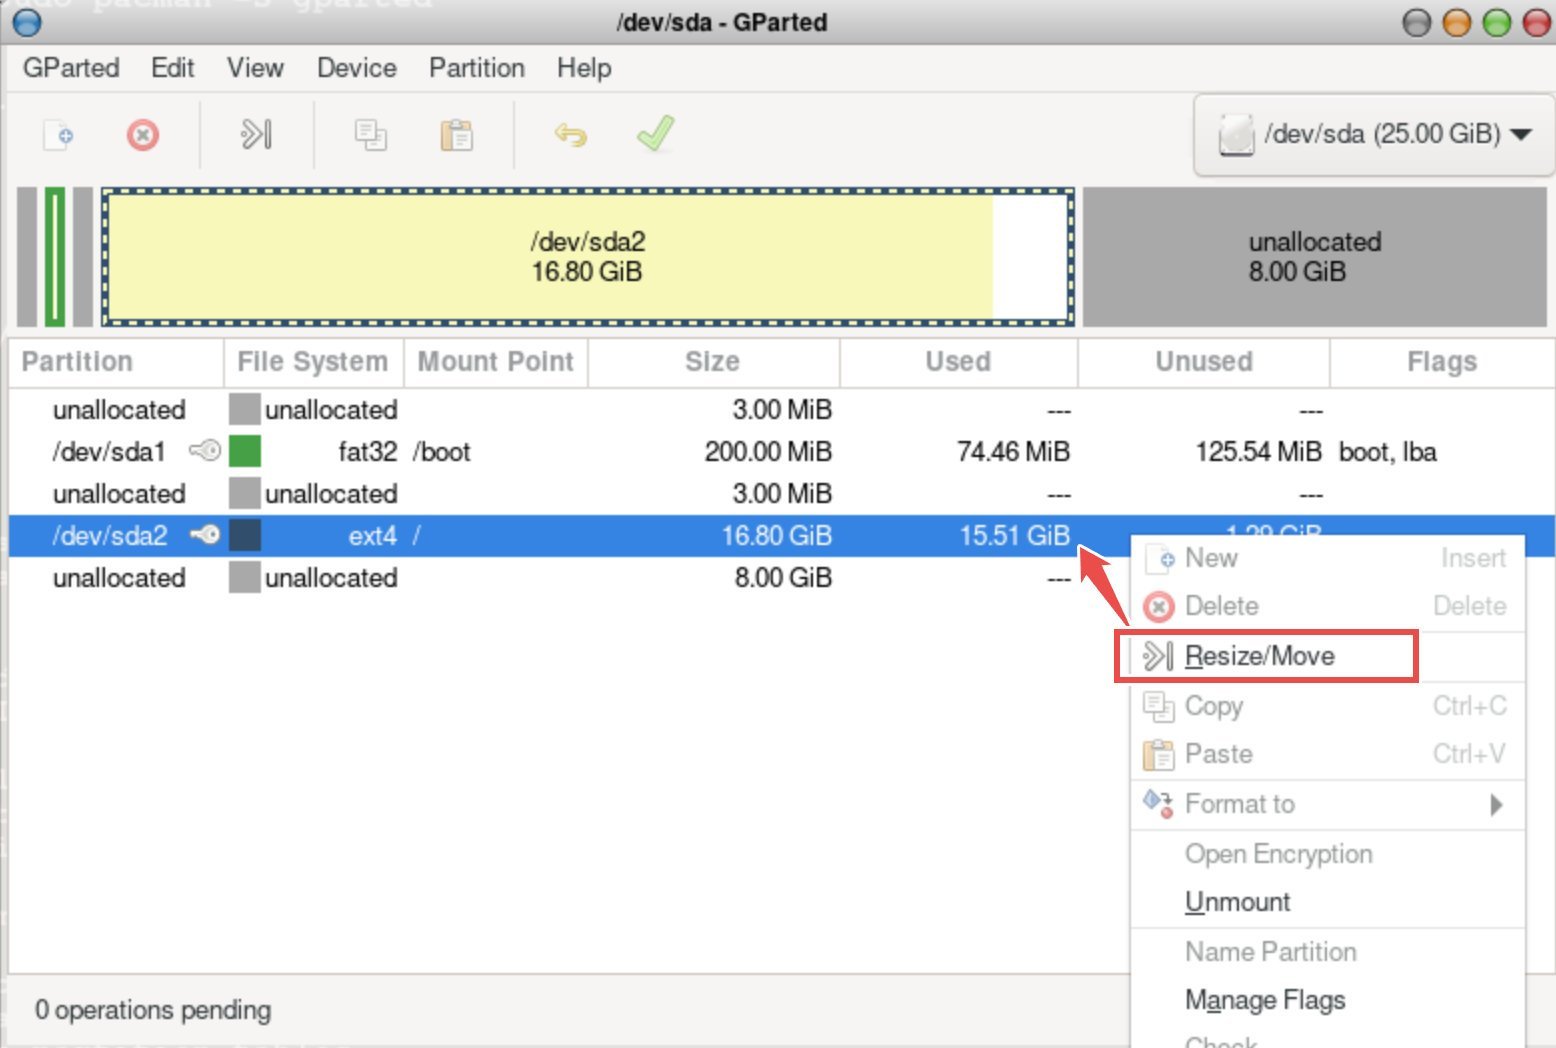
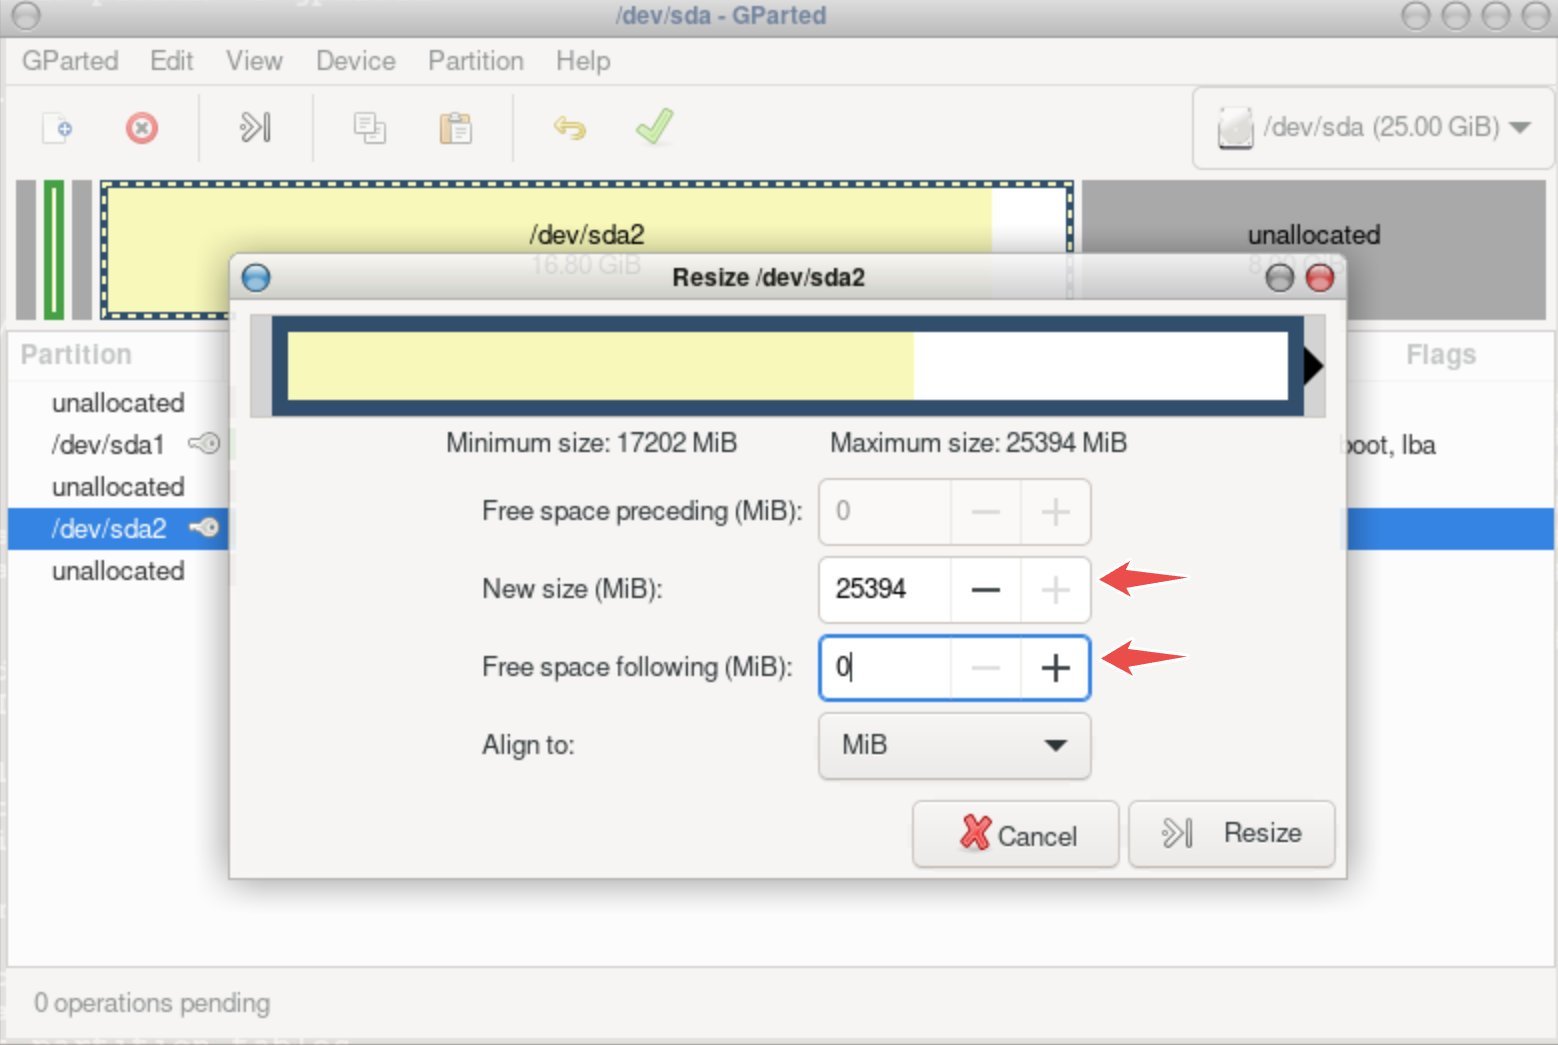
- Select the partition and choose resize/move from the Gparted context menu.
- Choose the new size as equal to the old size + the additional size. You can simply put 0 in Free space and gparted will take care of the rest.
- Click on Resize. And in the main Gparted window, click Apply (green tick mark).
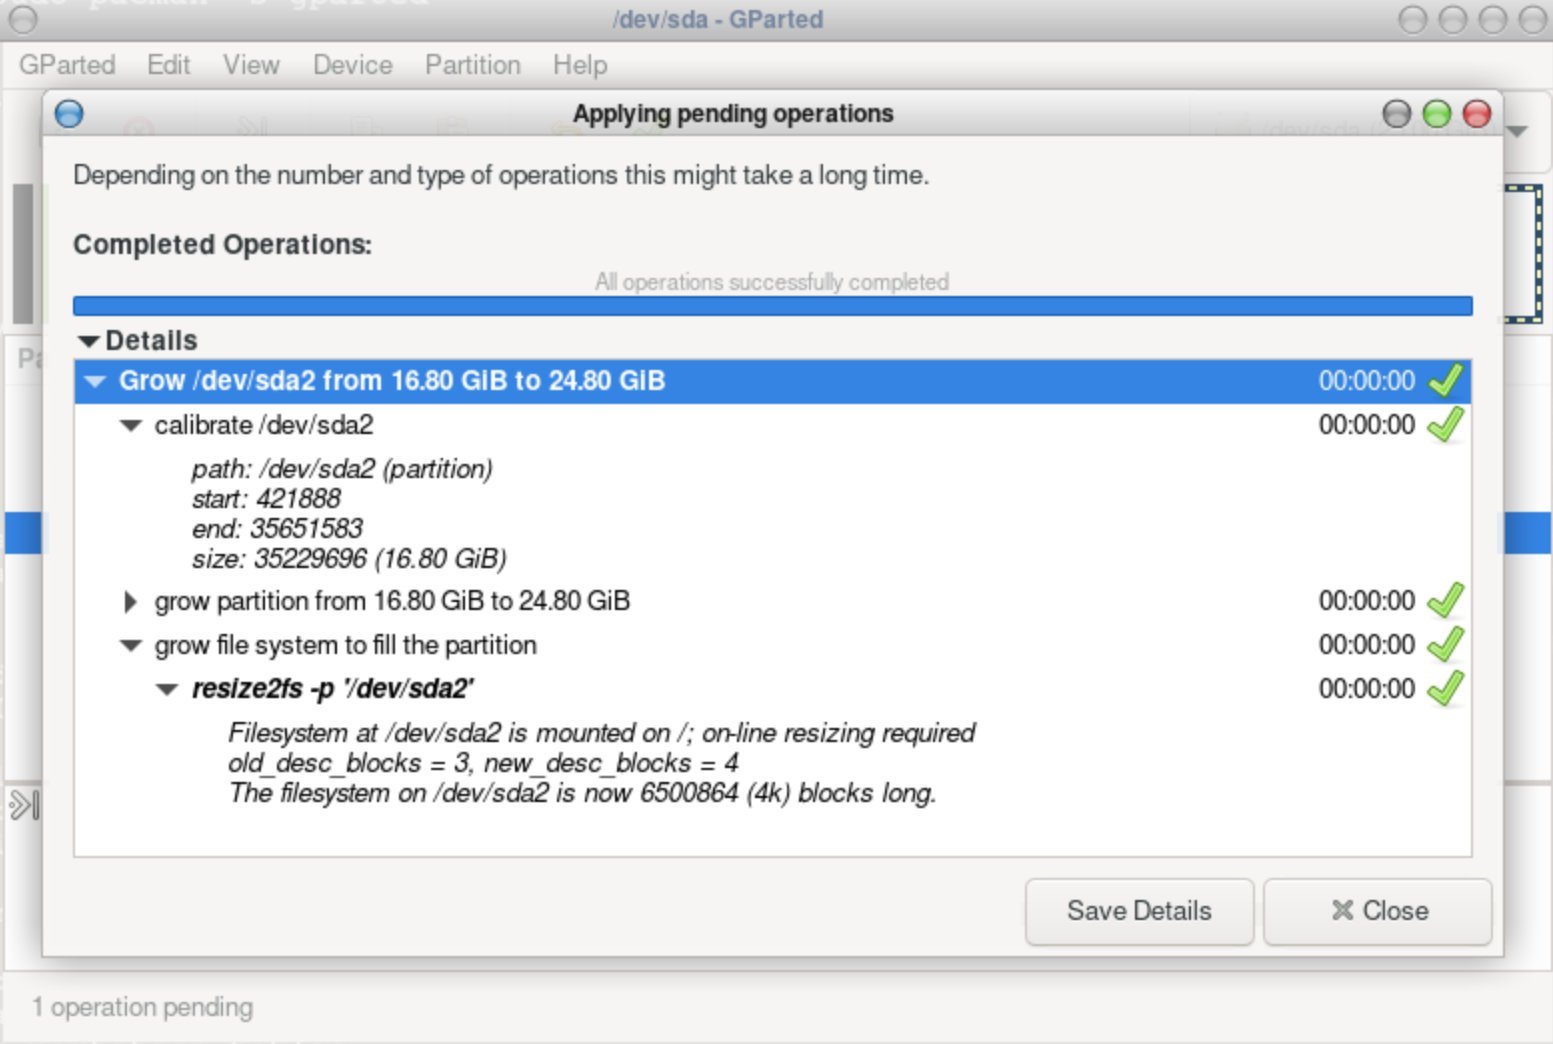
- GParted essentially runs the below command internally to resize the partition.
resize2fs -p /dev/sda2
- Once complete, close GParted and you should see your VM partition now has the extended size.
For Windows VM or if you don’t have GParted in your guest VM
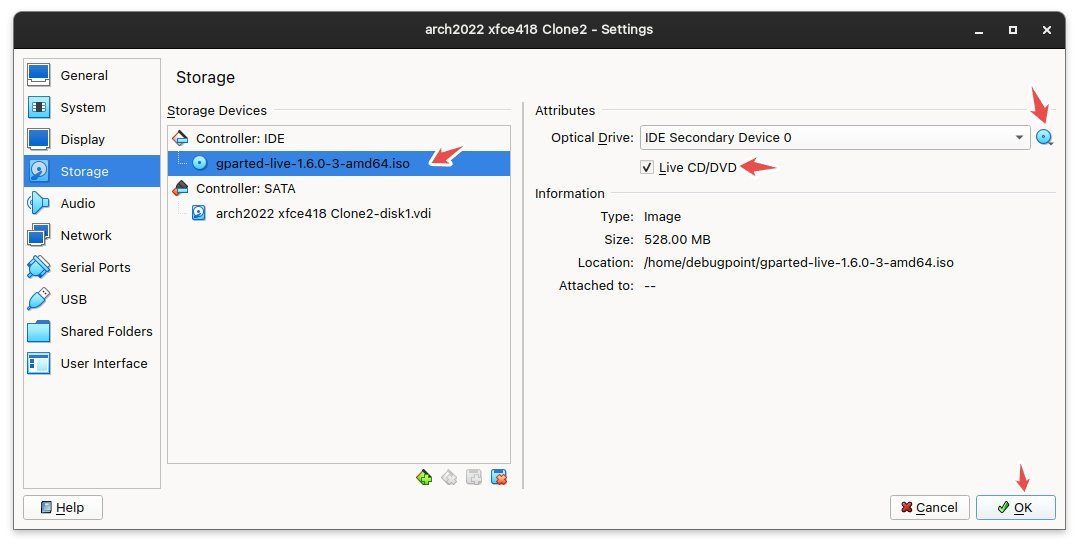
- There could be situations where your VM does not have the GParted installed OR, you are using Windows. For those cases, download the GParted LIVE ISO file from the website. Download link.
- After download, open VirtualBox and attach the ISO file as a Storage > IDE device optical drive (see below).
- Press OK and boot your virtual machine.
- You should see the partitions of your Windows VM or any other VM in GParted LIVE distribution.
- Now you can follow the above steps to resize. Once complete, reboot GParted LIVE distribution.
Wrapping up
I hope using this guide you can resize your VM size to a proper number. Overall, it is a seamless process that should not fail. But if you want to increase the size of your critical production virtual machine, then do a clone before resizing.


