A quick tutorial on how to create a WiFi hotspot in Ubuntu 18.04 LTS.
With the release of new long term version Bionic Beaver of Ubuntu operating system, it is now becomes more simpler to create WiFi hotspot. With the WiFi hotspot, you can share your PC/Laptop’s internet connection with wireless devices such as smartphones, TVs etc. Here’s how you can do it.
Update: This tutorial would only work if you are trying to share a WIRED/LAN internet connection as a hotspot in your Ubuntu system. This is because, most of wireless chips in Laptops/Desktops are not capable to connect to two wireless devices at the same time.
Steps to create WiFi HotSpot in Ubuntu
Table of Contents
Step1:
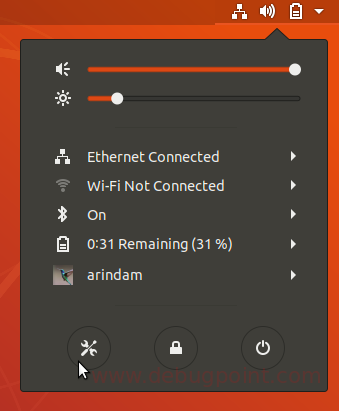
Open Settings from application menu or from system menu as shown below.
Step 2:
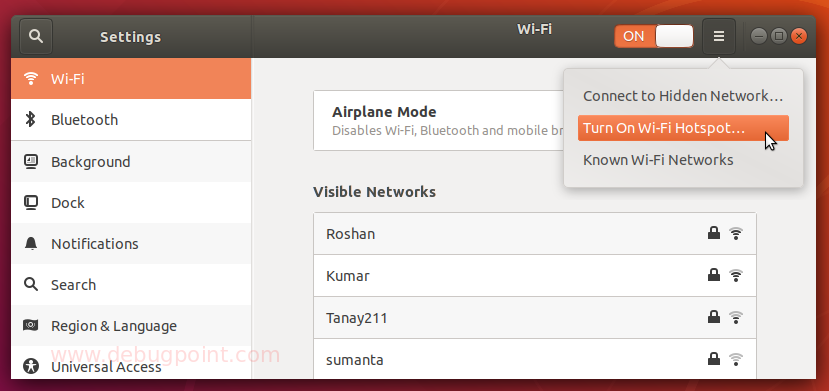
In the settings window left pane, click on WiFi.
At the top of the window, make sure WiFi is turned ON and then click more icon. From the context menu, click “Turn on WiFi hotspot”.
Step 3:
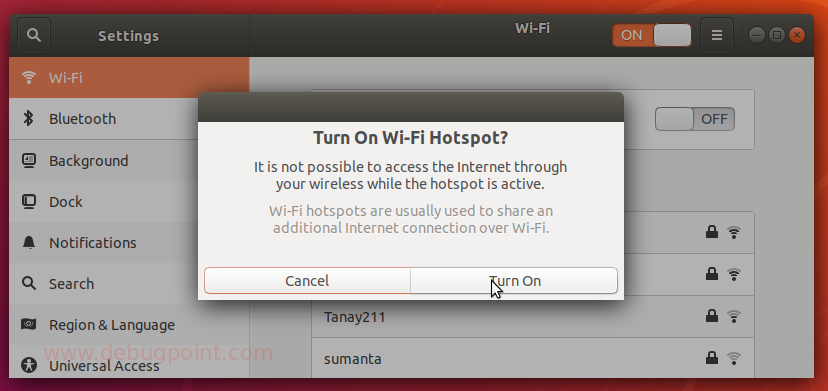
You will get a confirmation popup asking whether you want to turn it on. Click Turn On.
Step 4:
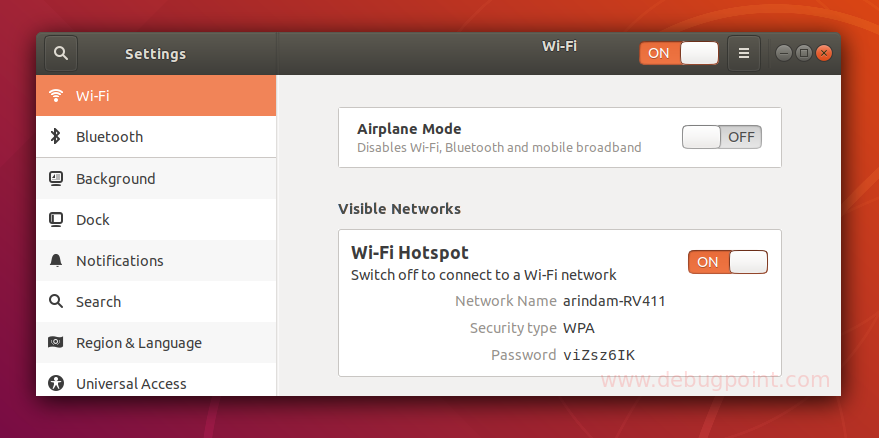
WiFi hotspot is created and you can see the Network Name (i.e. Access Point Name) and the password which you can search from your smartphones, other devices and connect.
Step 5:
That’s it. You have created a hotspot from Ubuntu.
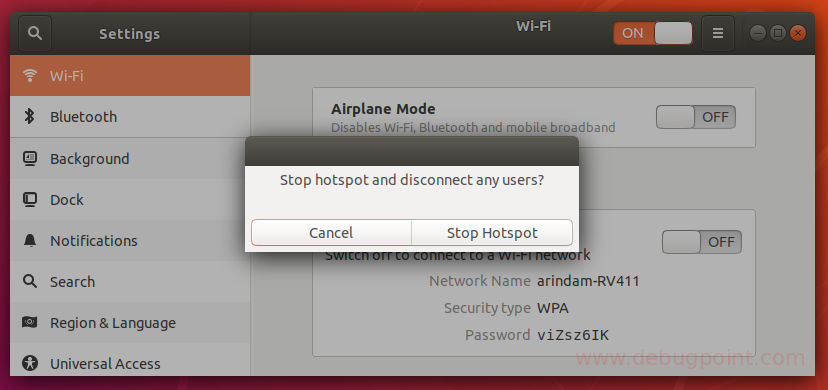
Step 6:
To turn off the hotspot, Click ON to turn it off in WiFi window above. On the confirmation popup, click ‘Stop Hotspot’.
Drop a comment, if you are having trouble creating a WiFi hotspot from Ubuntu.


