
Do you have an .img disk file? Here’s how you can create a virtual machine in VirtualBox using img file.
So, here’s what happened. The other day, while I was trying the distribution review for EasyOS, I faced a little trouble converting its default img installer file to iso. I did manage to convert the img to iso using the dd command (below).
dd if=easy-5.7-amd64.img of=easy-5.7-amd64.iso bs=512B conv=sync,noerror
But unfortunately, VirtualBox couldn’t recognize the boot sector, which is part of the default img file.
So, the only option left is to convert it to the native VirtualBox virtual machine image format, vdi.
Convert img to vdi for VirtualBox
If you have an img file and want to convert it to the default vdi image format of VirtualBox, use the following command. Not to mention that you need to have Virtualbox installed for it to work.
VBoxManage convertfromraw your-img-file-name.img target-file-name.vdi

After creating the vdi file, open VirtualBox and don’t select any ISO file and hit next in the first window. On the disk setup window, select the vdi file which you created under the option “Use an existing virtual hard disk file”.
Follow the onscreen instructions.
If all goes well, you should be able to boot the vdi file created from the img file.


Using the vdi file in KVM on virt-manager
The most interesting about the vdi file is it can also be used in virt-manager which uses KVM.
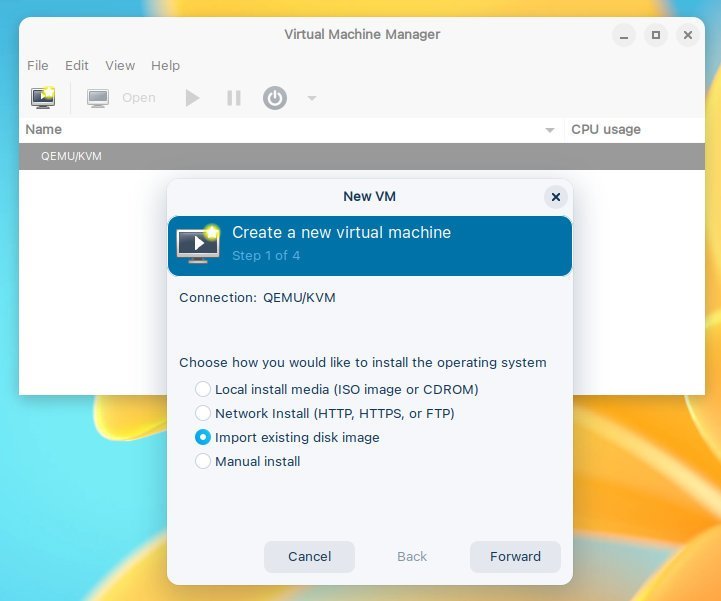
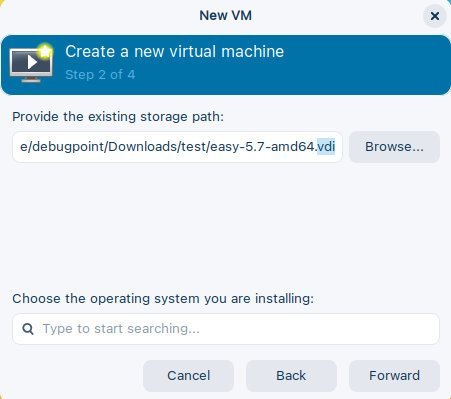
When you are creating a new machine in virt-manager, choose “Import existing disk image” in step 1. Then select the vdi image in the following screen, and you are good to go.
That’s it.


If this article helped you, do let me know in the comment box below.


