This quick guide explains the basic steps to install Ubuntu 21.04 Hirsute Hippo desktop edition.
This guide covers the following topics:
Ubuntu 21.04 Hirsute Hippo is the first short-term release of 2021 which brings moderate changes and updates. In case you missed it, here’s a quick recap of the new features of Ubuntu 21.04.
- Linux Kernel 5.11
- Wayland is now the default (Xorg is optional)
- Home directory default permission changed to 750, hence it is private
- Updated stock applications with GNOME 3.38
- UI refinements, dark theme updates
Table of Contents
Minimum System Requirements for Ubuntu 21.04 Installation (desktop)
- 2 GHz dual-core processor
- 4 GiB RAM (system memory)
- 25 GB of hard-drive space
- VGA capable of 1024×768 screen resolution
- Either a CD/DVD drive or a USB port for the installer media
- Internet access is required, but not mandatory for installation
In case if you are planning to upgrade to Ubuntu 21.04, make sure to check out our detailed upgrade guide here.
Pre-steps
Before you start the installation, make sure of the followings.
- If you are installing in a physical system, make sure to decide which partition you want to install.
- If you are planning for dual-boot with Windows or any other Linux Systems, then make sure you decide which partition to install.
- Take a backup of your personal data.
- Keep a LIVE USB with Boot Repair handy, in case something goes wrong.
Download
Download the Ubuntu 21.04 Hirsute Hippo installer .iso file from the below link. Once downloaded, create a bootable USB via Etcher or any other medium.
Install Ubuntu 21.04 Hirsute Hippo
- Plug-in the USB Stick
- Enter into the BIOS by pressing F2 or your system hardware-specific keys.
- For dual boot, make sure you disable secure boot via entering into the BIOS (this is applicable for new UEFI systems)
- Set the boot device priority to the USB stick. Save and exit from BIOS and restart.
- Wait for boot from USB.
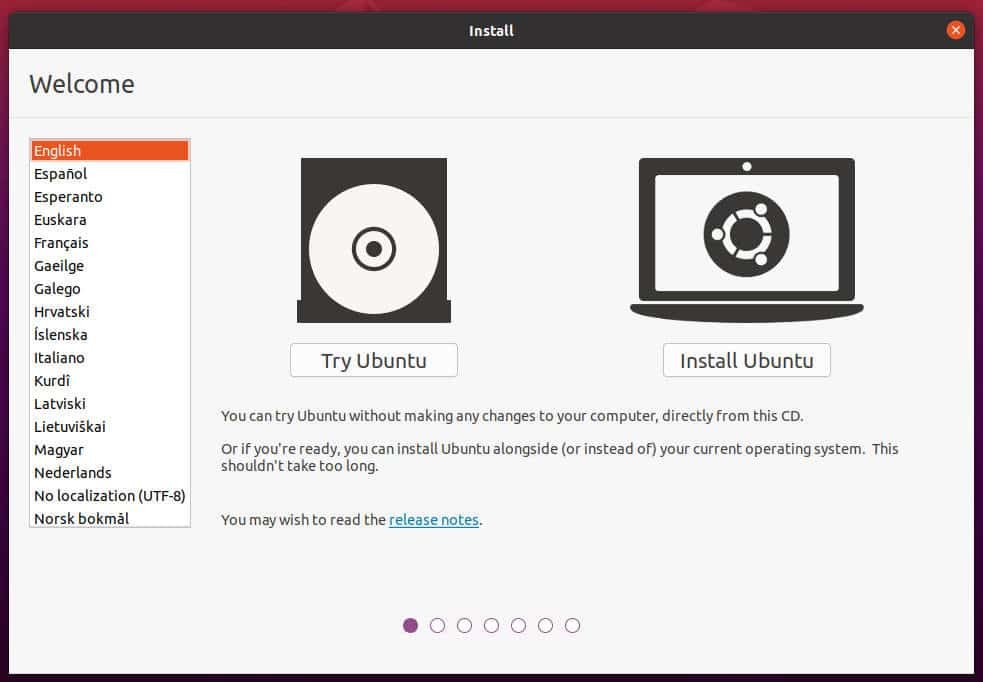
- You can either select to try Ubuntu at this stage, then you would be greeted with the LIVE System. Or click on Install Ubuntu to start installing.
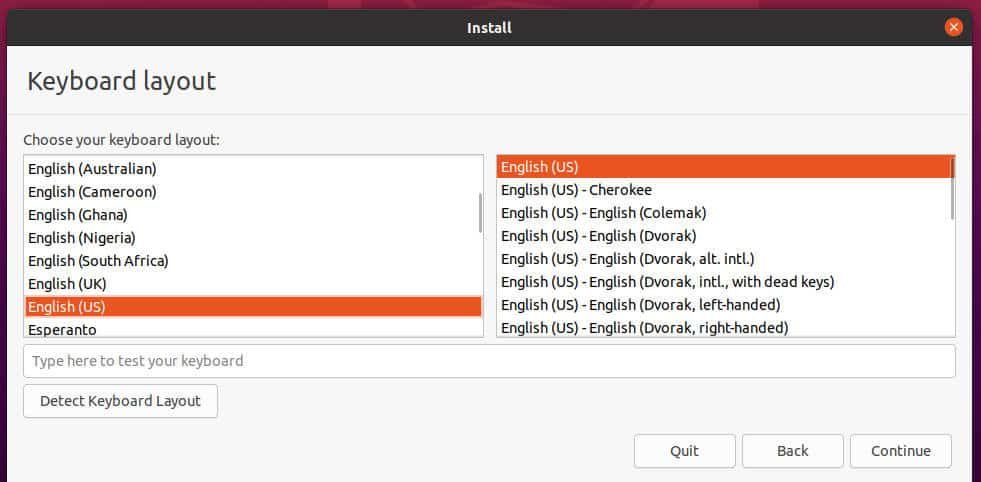
- Choose your Keyboard layout.
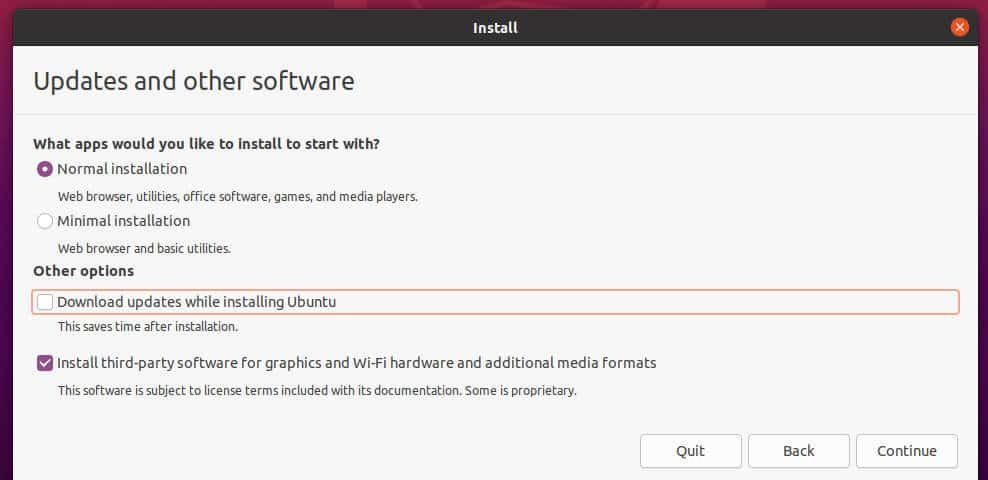
Choose what type of installation you would like to do. Recommended options are Normal Installation and select Install Third-Party Software for Graphics and Wi-Fi.
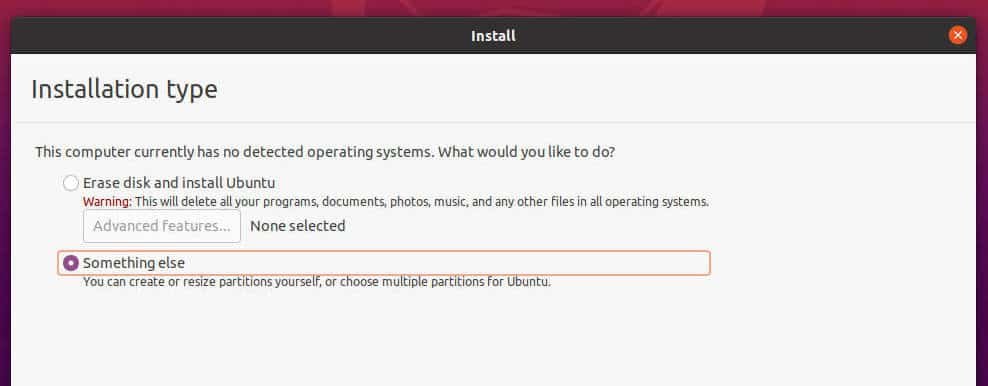
On the next Installation type window, choose Erase Disk if you want to format your disk completely and install Ubuntu. Take extra caution as this option can erase your entire disk.
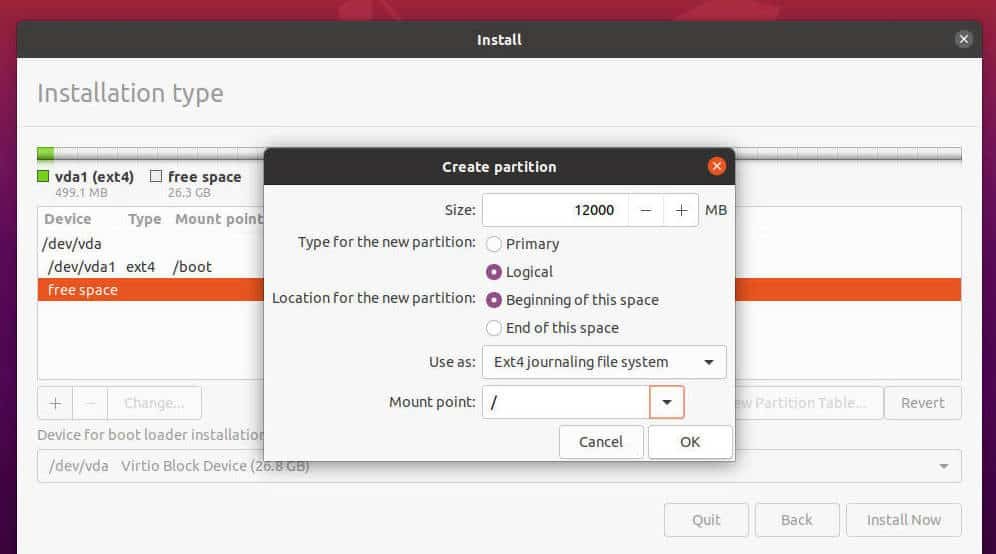
If you want to install in a specific partition, choose ‘Something Else’. On the next window, choose your partition and select mount point as “/”.
Create a partition table and then create two partitions. One for the /boot and another is for root (/). For the boot partition, keep around 500 MB of space. And for the root partition, you can specify as per your wish. Recommended root partition size is ~25 GB minimum.
A typical parition layout for Ubuntu installation is present below.
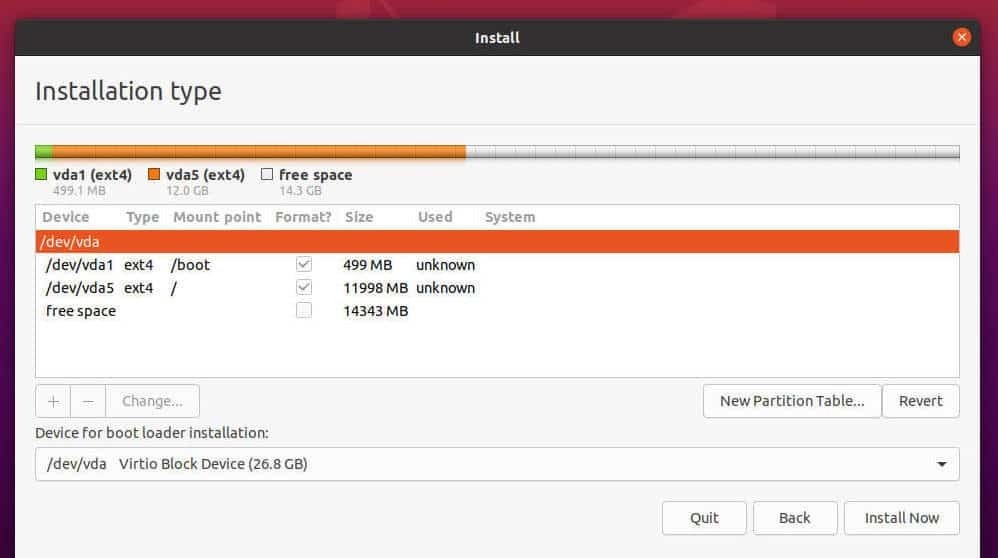
Click on the Install now which gives you a confirmation message what modification to be done on your physical disk. Press continue.
Once you press continue, physical modification starts on your device. So, if you want to change your mind on partition size and other things, click Go Back.

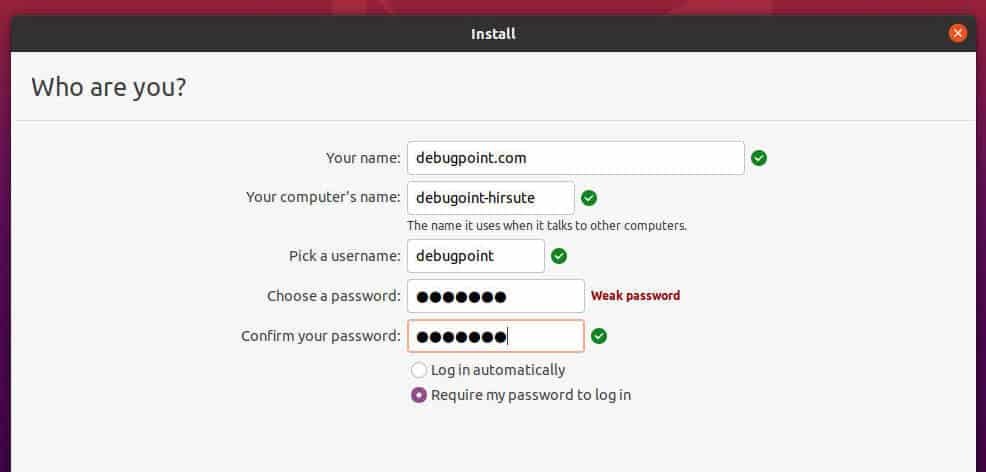
Give your name and name of your system along with the password.
Wait for the installation to finish.

After successful install, you should see a prompt below mentioning that the installation is successful.

Restart your system and enjoy the Ubuntu 21.04 desktop.
I hope this absolute beginner’s guide helped you to install the Ubuntu 21.04 Hirsute Hippo in a virtual machine, single system, or in a multi-boot environment.
As you now already installed it, don’t forget to set your system up by following our guide “10 things to do after Installing Ubuntu 21.04“. Also, you might want to check out our feature coverage of Ubuntu 21.04 to find out about the new features in detail.
If you run into problem, don’t forget to let me know using the comment box below.


