Fedora 33 is released with many new features and updates. Here is a list of 10 things to do after installing Fedora 33.
This list which I think applies to most of the beginners to advanced Fedora desktop users. However, there might be some more tweaks that you do as per your need which is not here. This is just a guideline for you to get started with Fedora 33 after install.
Table of Contents
10 Things to Do After Installing Fedora 33
1. Update Your System

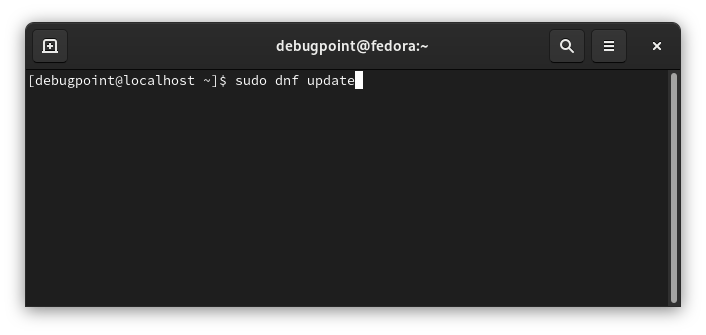
The first thing that you should do after installing Fedora 33 Workstation edition is to make sure that you update the system. You can open a terminal window and run the below command.
sudo dnf update
The first time you do this, it would take some time to get the updated repo information. So be patient while the command executes.
2. Change Touchpad settings (Laptop)
The ‘tap to click’ option is not enabled by default. I do not know why this setting is not enabled by default in most of the Linux desktops. This is very annoying if you are using Laptops.
To enable ‘Tap to click’, open Settings and go to the ‘Mouse and Touchpad’ tab. Then enable Tap to Click under Touchpad settings.
3. Enable RPM Fusion Repository
The RPM Fusion software repo is a community-maintained software repo that provides additional packages for Fedora Linux which is not distributed by the official Fedora team such as DVD playback, media playback, software from GNOME and KDE, etc. This is because of licensing and other legal reasons and country-specific software norms as well.
sudo dnf install https://download1.rpmfusion.org/free/fedora/rpmfusion-free-release-$(rpm -E %fedora).noarch.rpm
sudo dnf install https://download1.rpmfusion.org/nonfree/fedora/rpmfusion-nonfree-release-$(rpm -E %fedora).noarch.rpm
4. Install GNOME Tweaks
This extension is super useful because of a lot of settings that require changes after a fresh installation of Fedora – GNOME edition. For example, changing themes, enabling maximize buttons in window dialogs, and many more.
To install Open Software and search for Gnome Tweak, Or, run the below command from the terminal.
sudo dnf install gnome-tweak-tool
After installation finds the GNOME Tweak toom in the application menu. Now you can use this to change different settings of your GNOME desktop.
5. Install Dash to Dock (for GNOME edition)
The GNOME Dash can be configured as per your need using this extension. For example, you can autohide the GNOME Dash and bring it up with a mouse hover. Or you can keep it stick to the left/right edge of your desktop.
To install this, go to the GNOME extension website. Based on your browser, you need to configure your system to use the GNOME extension.
If you are using Firefox, click on the ‘install browser extension’ link on the above page, click continue. After installation, click Add.
Now, go to the Dash to Dock extension page. Click on the Off button to enable it.
Provide your admin password to install. Now you can use the GNOME Tweak tool to configure the default left GNOME dock.
6. Enable Minimize, Maximize buttons
Open the GNOME Tweak tool and go to Window Titlebars. Enable the Maximize and Minimize buttons.
Again, I am not sure what is the use case behind this. It should be enabled by default.
7. Install Additional Software
The GNOME edition comes with basic utilities to get you started unline other desktops. For example, Cinnamon, KDE Plasma, etc – they comes with pre-loaded applications for various needs.
But not GNOME. Hence, you can consider installing some additional applications as per your need. I have added some important ones below for your reference.
You can install these either via command line or search in Software.
- GIMP – advanced image editor
- VLC – media player
- Leafpad – Notepad replacement
- Any code editor : Atom / Sublime Text / Brackets
8. Install additional multimedia codecs
You can enable RPM Fusion to play multimedia files that use gstreamer, and additional multimedia playback packages via the below command.
sudo dnf groupupdate multimedia --setop="install_weak_deps=False" --exclude=PackageKit-gstreamer-plugin
sudo dnf groupupdate sound-and-video
9. TLP for Battery health management

TLP is a great utility to help optimize your Laptop’s battery. This utility comes with various command-line options to tweak and view reports about power consumption.
TLP is so good that you just need to install it and forget it. This doesn’t require any settings or set up to make it work. It just works out of the box after you install it with its default settings.
dnf install tlp tlp-rdw
If you have a Thinkpad laptop, you may consider running the below commands for Thinkpad specific packages for TLP which gives you more info and control on your battery.
dnf install https://download1.rpmfusion.org/free/fedora/rpmfusion-free-release-$(rpm -E %fedora).noarch.rpm
dnf install https://repo.linrunner.de/fedora/tlp/repos/releases/tlp-release.fc$(rpm -E %fedora).noarch.rpm
dnf install kernel-devel akmod-acpi_call akmod-tp_smapi
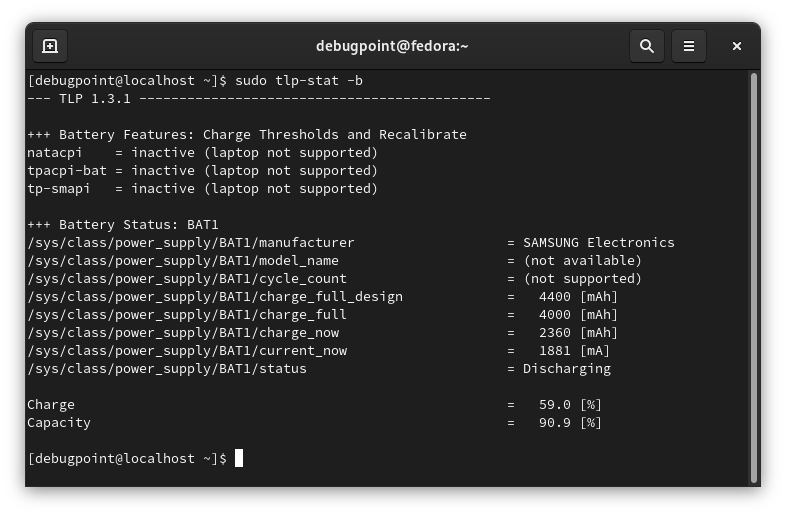
After installation, run below to view the Battery informations and status.
sudo tlp-stat -b
10. Install Additional Desktop Environments
It is very easy to install other desktop environments in Fedora when you are running the GNOME version. The core is already installed for you, hence you can easily install the basic framework for other desktops.
For example, if you like to install KDE Plasma or XFCE desktop with Fedora 33 – you do not need to download and install the entire respective Fedora Spin .iso file. You can easily follow this method to install an additional desktop environment. Open a terminal and run the below commands.
First, run below to check the available environment package names.
sudo dnf grouplist -v
You can see the list of environments available below.

Now you can install your favorite desktop using the name below.
sudo dnf install [environment name]
sudo dnf install @cinnamon-desktop-environment
Remember this will install the entire desktop environment minus the common packages which you might have already as you are running native Fedora with default desktop environment.
After download and install, reboot the system. Then choose the installed desktop on the login page.
So, these are 10 things which you may consider to do after a fresh install of Fedora 33 workstation edition. I know these are not perfect or only things that you do typically. But a guideline to make you productive in no time after a fresh install or upgrade.
Do let me know if there are other things that you do but no on this list to make yourself productive.